


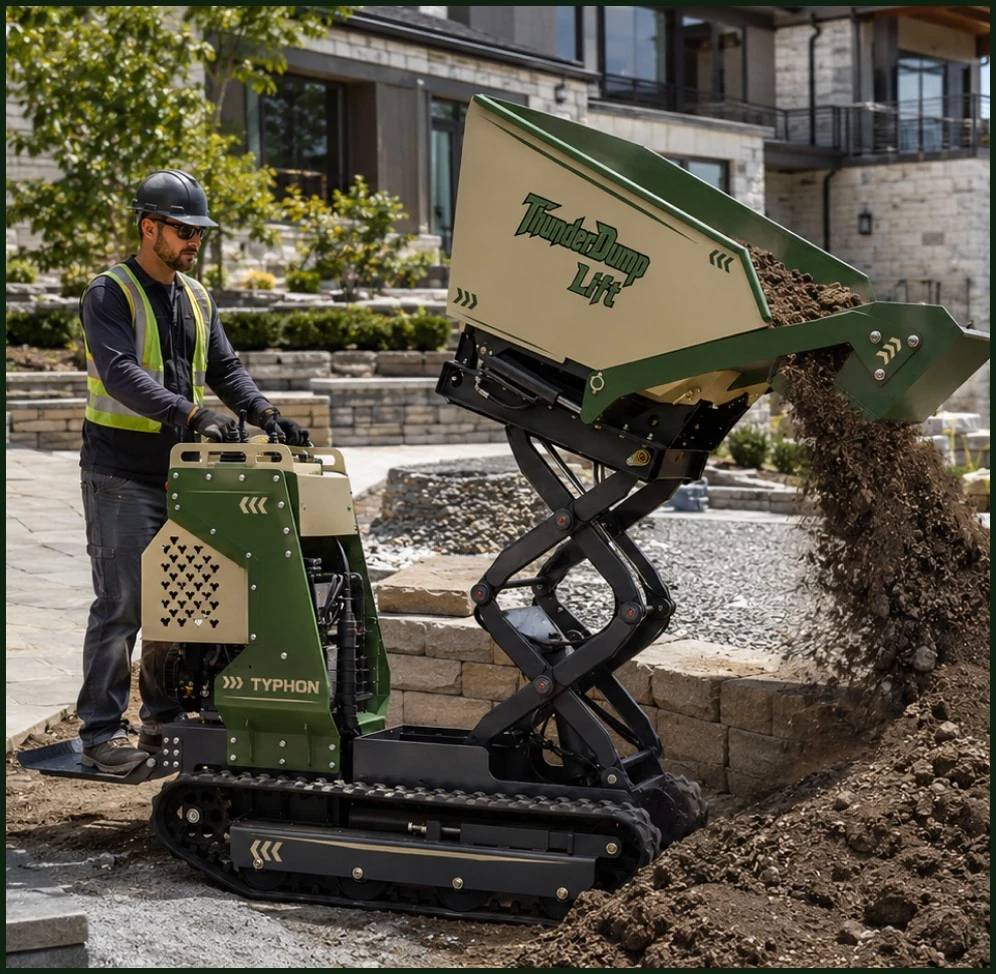
A mini dumper can remove one of the slowest parts of small-site work: carrying soil, aggregate, mulch, concrete debris, or supplies between the work area and a disposal or placement point. Its value comes from organizing a repeatable material-handling cycle, not simply replacing a wheelbarrow with an engine. The loading area, haul route, dump point, material, and crew must be planned together.
Design the Material Path First
Map where material begins, where it must go, and how the dumper will travel between those points. Measure gates, paths, turns, ramps, overhead clearance, and the space needed to load, stop, and dump without entering pedestrian routes. A compact dumper is useful where a larger loader or truck cannot work efficiently, but it still needs a route wide and strong enough for the loaded machine.
Short, clear cycles usually create the largest productivity gain. Place the loading and dumping zones so the dumper spends less time waiting for an excavator, loader, or crew. If more than one machine shares the route, establish right-of-way, communication signals, and a place where equipment can wait without blocking access.
Match the Dumper to the Material
Check rated payload as well as skip volume. Wet soil, stone, broken concrete, and other dense materials can reach the weight limit before the skip looks full. Loose mulch or green waste may fill the available volume first. Estimate material density conservatively, keep the load contained, and do not add sideboards or modify the skip unless the manufacturer approves the change.
Choose the discharge style for the receiving point. A standard tip is straightforward for ground piles and low containers. Swivel, rotating, or high-tip designs can place material more precisely or reach a higher receiver, but their raised or offset loads change clearance and stability. Confirm the machine’s rated capacity and permitted procedure for the exact skip position.
Create a Controlled Loading Zone
Load on firm, stable ground with the dumper stopped and positioned as the manual requires. Distribute material evenly and prevent large pieces from projecting beyond the skip. The excavator or loader operator should avoid striking the dumper, controls, or operator station, and no one should stand between the loading machine and the dumper. Never carry a passenger unless the machine is specifically designed with an approved passenger position.
Before moving, lower or secure the skip in the prescribed travel position, check that the route is clear, and confirm that the load does not block required visibility. Use a trained spotter where clearance is limited, but stop immediately if communication is lost.
Treat Slopes as a Machine-Specific Limit
Do not rely on a universal rule about which end of a dumper should face uphill. Permitted grade, travel direction, load orientation, skip position, and braking procedure vary by design. Read the operator’s manual and data plate for the exact model, then assess surface strength, moisture, traction, edges, drop-offs, and the consequence of losing control before using a sloped route.
- Avoid turning, stopping abruptly, or changing direction on a slope unless the manufacturer’s procedure allows it.
- Do not travel across a slope or near an unsupported edge merely because the machine has tracks or four-wheel drive.
- Keep the load within capacity and in the manufacturer’s specified travel position.
- Do not raise or tip the skip on a slope unless the manual explicitly permits that operation in the actual conditions.
- Use a different route, reduce the task, or select other equipment when the slope cannot be managed within the documented limits.
Set Up a Safe Dumping Point
Dump on firm, stable ground with enough room for the machine, raised skip, and discharged material. Check overhead obstructions and keep people clear of the machine, articulation or track zones, skip, tailgate, and falling material. At trenches, banks, retaining edges, or stockpiles, maintain a site-determined setback so the ground supporting the dumper cannot collapse.
For a high-tip dumper, confirm that the receiving container is compatible and that the machine is level and positioned as the manual specifies before raising. Lower the skip fully before travel unless the manufacturer provides a different approved travel position.
Inspect, Coordinate, and Measure the Cycle
Before use, complete the manufacturer’s inspection and functional checks. Depending on the model, these may include tires or tracks, steering or drive controls, brakes, alarms, hoses, cylinders, skip pivots and locks, guards, fluid or battery condition, leaks, and emergency stops. Remove the machine from service when a defect affects safe operation.
Measure productivity by the complete cycle: safe loading, travel, queuing, dumping, return, and cleanup. A smaller dumper that moves continuously through restricted access can outperform a larger machine that waits or cannot reach the work. Clear routes, compatible loading equipment, trained operators, and disciplined communication are what turn the dumper into an effective jobsite system.
Equipment Guidance
Need help choosing equipment for your next job?
Contact KONSTRUCTZ support and get practical guidance before comparing machines, attachments, or jobsite requirements.Contact SupportReader Comments
Join the equipment discussion
Related Posts
Keep comparing before the next job
 Machinery EducationIntroducing KonstructZ: Heavy Equipment Built for Serious Work5 min read
 Machinery EducationKonstructZ Heavy Equipment | Mini Excavators, Skid Steers, Forklifts, Road Rollers & More4 min read
 Scissor Lifts, Maintenance & SafetyScissor Lift Safety Guide: Inspections, Setup, and Safe Operation10 min read
No published comments yet.