


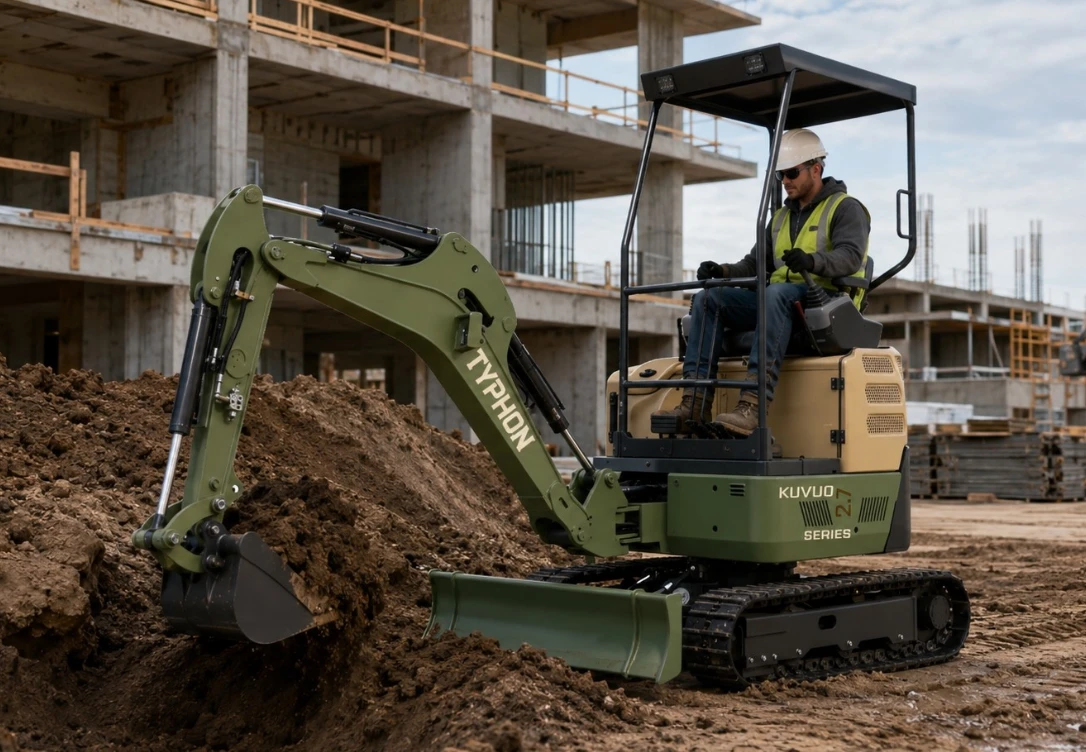
Choosing the right mini excavator starts with the work, not the model badge or the largest number on a specification sheet. A useful match must reach the excavation from a safe setup position, pass through every access point, carry the intended attachment, travel on the available surface, and fit the transport and service plan. Define those limits before comparing machines.
Build a Job Profile
List the recurring tasks the excavator will perform: utility trenches, drainage, foundations, planting, stump removal, grading, demolition support, or material placement. For each task, record the required depth, horizontal reach, dump height, material, bucket width, working clearance, and expected hours per day. If lifting pipe, structures, or other suspended loads is part of the work, treat that as a separate requirement and use only a machine, lifting point, attachment, and procedure approved for lifting.
Size for the most demanding routine condition rather than one unusual project. Renting a larger or specialized machine for an occasional outlier can be more practical than owning a machine that is unnecessarily compact or wide for everyday work.
Measure Access and the Full Working Envelope
Measure gates, doors, paths, trailer ramps, overhead obstructions, and the space available for the upper structure to rotate. Compare those measurements with transport width and height, track width, blade width, tail swing, boom swing, attachment dimensions, and ground clearance. A retractable undercarriage may help a machine enter a narrow opening, but it must be expanded or positioned only as the manufacturer directs before work begins.
Zero- and reduced-tail-swing designs can reduce rear overhang near walls or traffic. They do not eliminate clearance needs: the counterweight, boom, blade, bucket, and load still move through an operating envelope that the operator must keep clear. Plan spoil placement, exclusion zones, and required underground-utility locating before excavation begins.
Compare Working Range and Capacity
Maximum digging depth is only one point on a working-range chart. Check the reach and depth available from the planned machine position, then confirm dump clearance for the truck, dumper, or spoil pile receiving the material. Bucket size should suit both the trench and the material; a bucket that works in loose soil may be too large when filled with dense, wet, or broken material.
Lifting capacity changes with radius, height, attachment, machine orientation, and setup. Use the manufacturer’s lift chart for the exact configuration, not the bucket breakout force or an estimate based on machine weight. Never assume that a hydraulic thumb, quick coupler, or heavier bucket has no effect on stability or rated capacity.
Account for Ground Conditions and Transport
Operating weight affects flotation, surface damage, transport, and recovery. Include the coupler, bucket, thumb, cab, counterweight, fluids, and any attachment carried with the machine when checking trailer payload, axle ratings, tow-vehicle limits, tie-down points, loading angle, and local transport requirements. Soft ground may require wider tracks or ground protection, while finished surfaces may need careful route planning.
Ask how the exact model may be operated on slopes and near edges. Gradeability does not make every slope safe; soil strength, moisture, travel direction, attachment position, and machine configuration all matter. The operator’s manual and a site-specific assessment should control the method.
Match Hydraulics and Attachments
Identify the attachments needed during the first year, such as trenching and grading buckets, a thumb, auger, breaker, compactor, or tilt bucket. Confirm coupler type, pin dimensions, attachment weight, auxiliary flow and pressure, return-line or case-drain needs, electrical controls, and any manufacturer restrictions. Physical connection alone does not establish compatibility.
Evaluate the Operator and Support Plan
Arrange a demonstration that includes digging, grading, loading at the required height, traveling over representative ground, and changing the intended attachment. Check visibility to the bucket and tracks, control response, entry and exit, seat and display adjustment, noise, and access for daily inspections. Also compare manuals, training information, warranty terms, diagnostic support, parts availability, and service response.
Use a Final Comparison Checklist
- Work: Required depth, reach, dump height, material, lift, and daily cycle.
- Site: Access width, tail-swing clearance, utilities, overhead hazards, surface, slope, and edge conditions.
- Configuration: Operating weight, tracks, blade, coupler, bucket, hydraulics, and attachments.
- Logistics: Trailer, tow vehicle, loading method, tie-downs, storage, fuel or charging, and recovery.
- Support: Operator training, inspection access, manuals, parts, warranty, and local service.
The best mini excavator is the one that completes the largest share of the real workload without forcing compromises in access, stability, transport, or attachment compatibility. Compare complete working configurations and use the operator’s manual as the controlling source for machine-specific setup and operation.
Equipment Guidance
Need help choosing equipment for your next job?
Contact KONSTRUCTZ support and get practical guidance before comparing machines, attachments, or jobsite requirements.Contact SupportReader Comments
Join the equipment discussion
Related Posts
Keep comparing before the next job
 Mini ExcavatorsMini Excavator Maintenance Checks Before Starting Work11 min read
 Skid Steers, Equipment Buying GuidesSkid Steer and Compact Track Loader Buying Guide: Size and Attachments13 min read
 Wheel Loaders, Equipment Buying GuidesWheel Loader Buying Guide for Construction, Farming, and Landscaping12 min read
No published comments yet.